



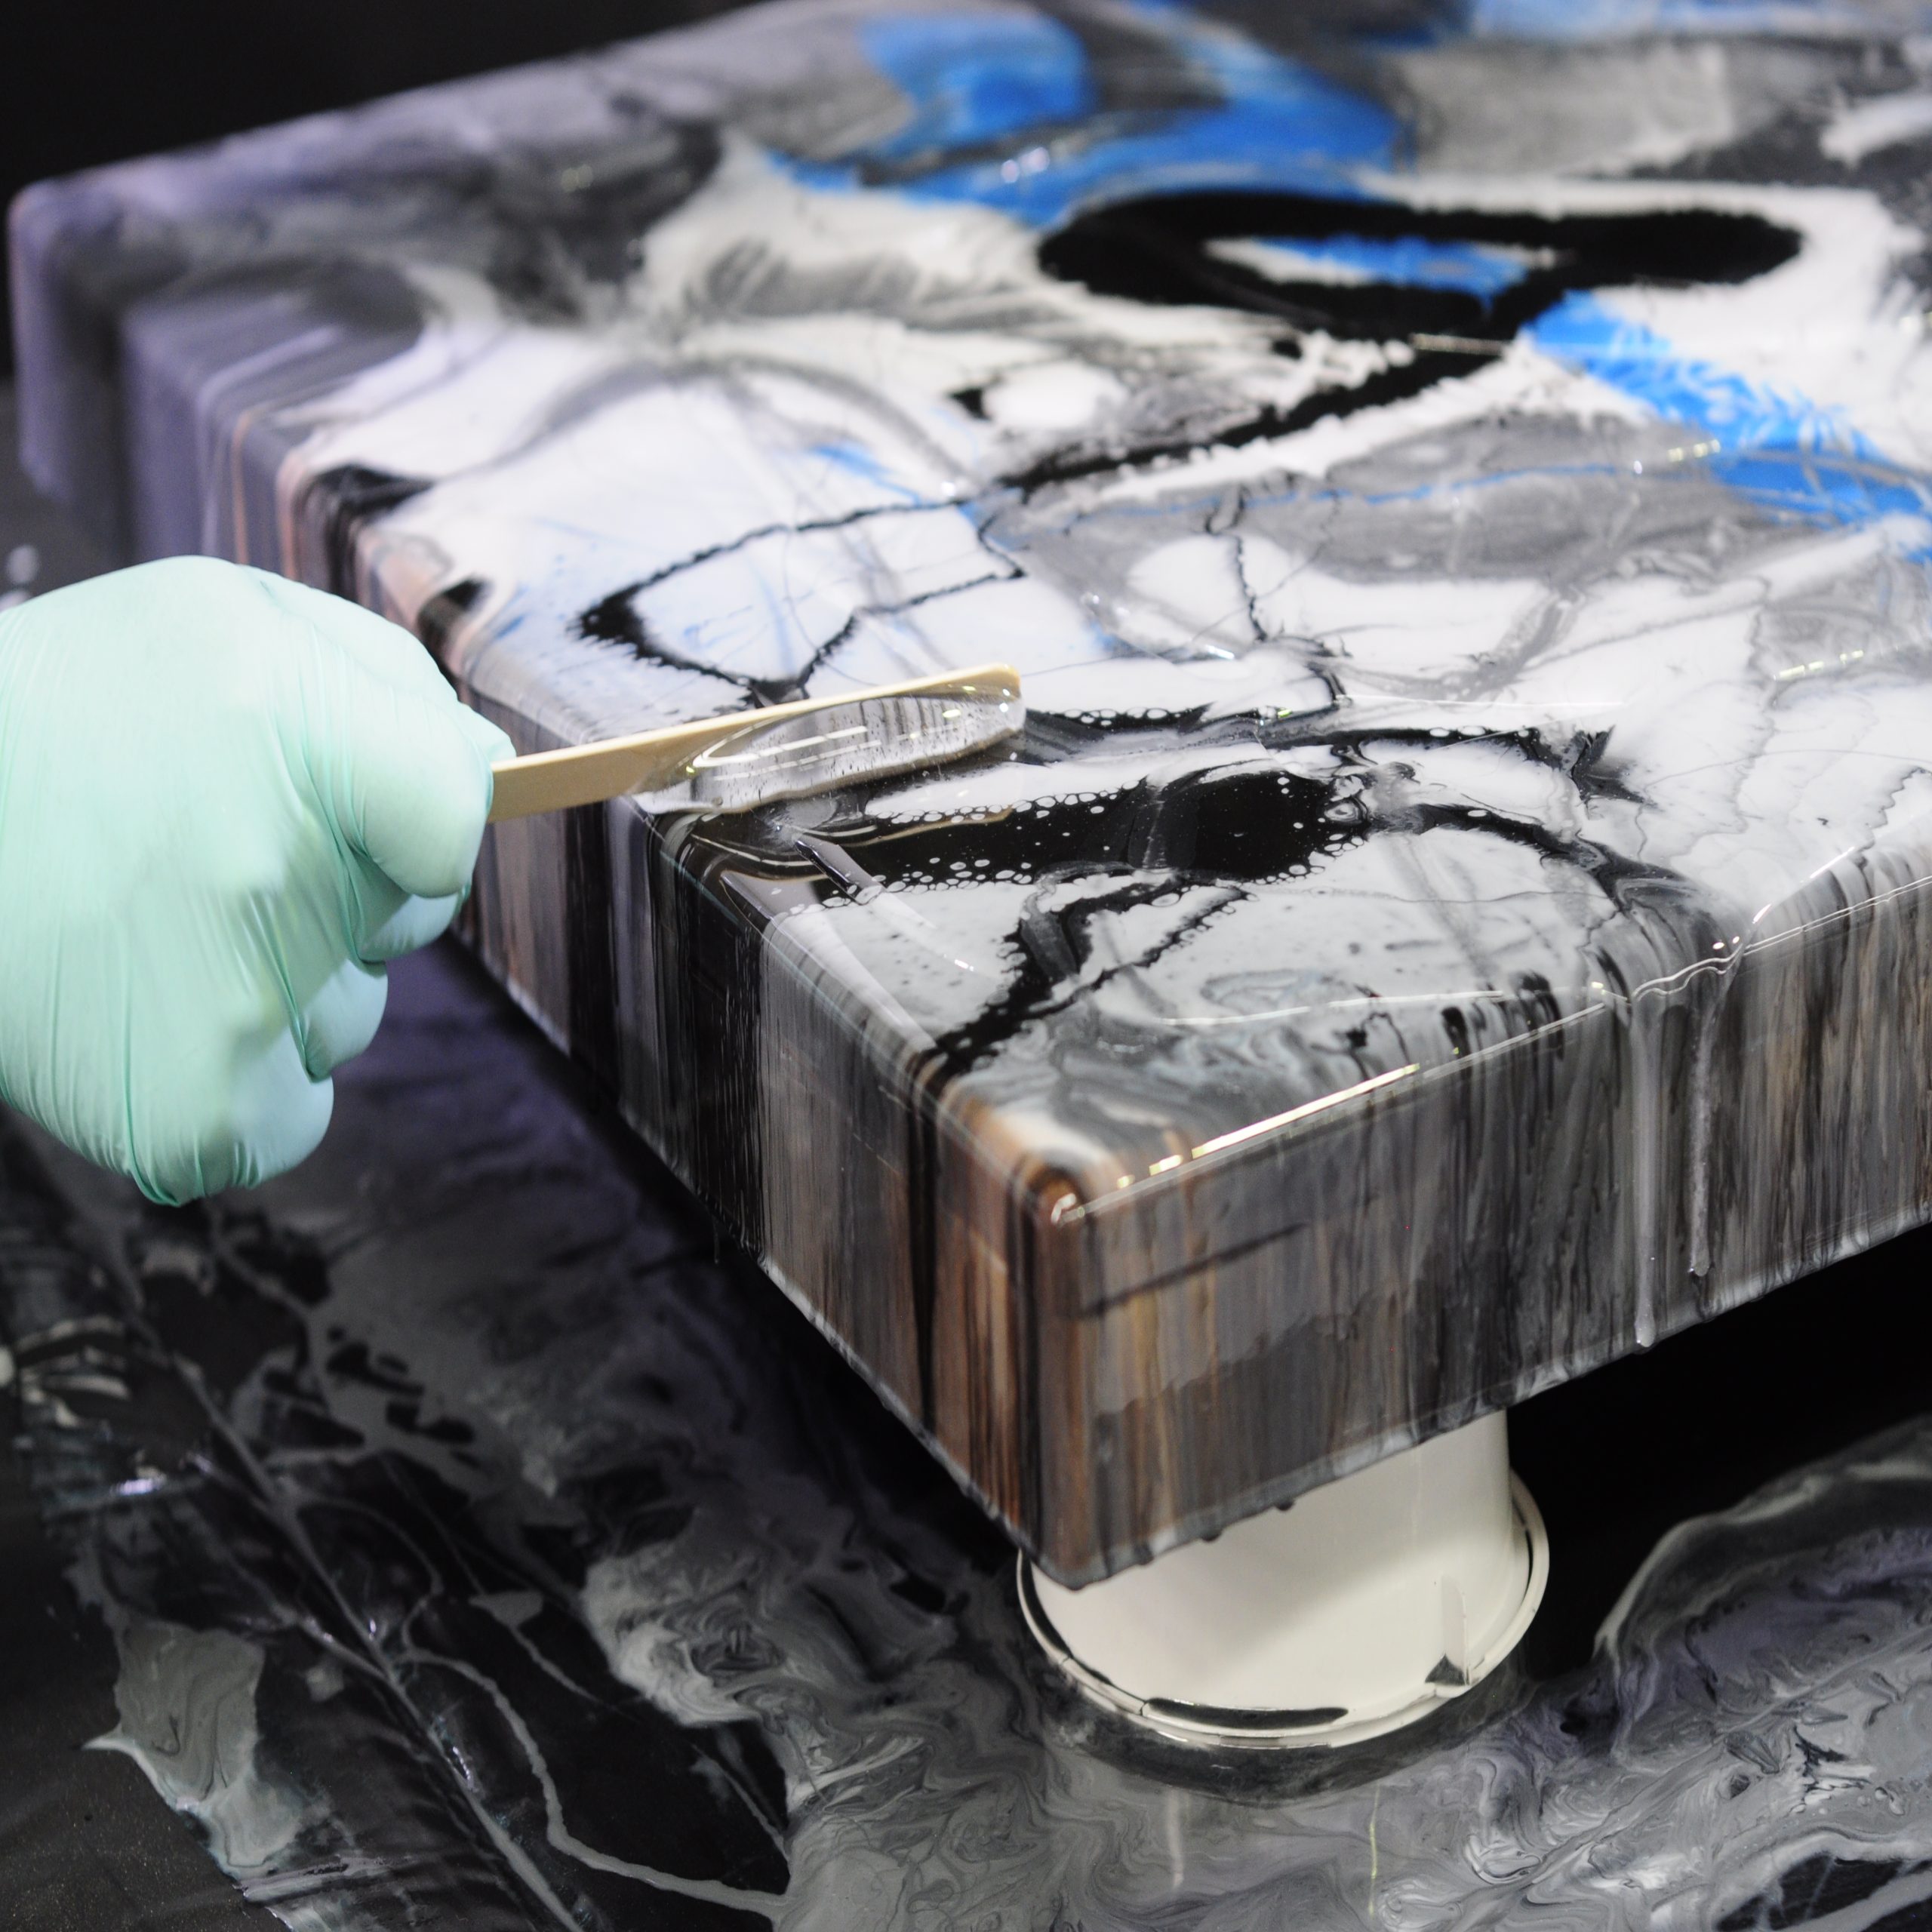
How to make resin art
Resin art covers two different jobs. Pouring a glossy skin across a flat art board is one. Casting a coaster, a bangle or a piece of jewellery inside a mould is another. They need different resins, and choosing the wrong one is the most common reason a first project never sets properly.
This guide covers both. Which resin suits which job, how much pigment to add before it stops curing, what to pour into, and a full step by step for a poured art board using Barnes Epoxyglass.
Every figure below comes from that product’s own page. Read the SDS and TDS for the product in your hands before you start.
Safety First!
Before using our products, please read the SDS and TDS, located under the product description on our websites. Always use resin in a well ventilated, dedicated space, away from children and animals. Use personal protective equipment such as gloves, mask, goggles and apron whilst measuring, mixing, casting or sanding resin. Resin is not recommended for use by children under the age of 18, or during pregnancy.
Which resin for which job
The first thing to settle is depth.
A coating resin sits on top of a flat surface as a thin film. A casting resin fills a mould or a cavity and cures as a solid piece. The two are formulated differently. Pour a coating resin deep and it generates far more heat than it was designed for. Spread a deep pour resin thin and it may never cure at all.
Barnes Epoxyglass is a coating resin. Its own guidance puts a coating application at 1 to 3mm in depth on average. That is exactly why it works on an art board, a tabletop or a tray, and exactly why it is the wrong choice for a bangle mould.
Flat art boards, canvas, tabletops, trays and doming
Epoxyglass Clear Coating Epoxy. Mixed 1:1 by volume, cures to Shore D80, and carries built in UV stabilisers to reduce yellowing. The walkthrough further down this page uses it.
Coasters and other shallow moulds
CLARITI PRO Epoxy Casting Resin. It allows poured sections of 3 to 10mm thick, mass dependent, which is the range a coaster lives in. Mixed 2:1 by volume. A 100gm mass at 23C gives 10 to 20 minutes of pot life and demoulds in 6 to 12 hours, and it cures to Shore 80D. Because it cures quickly, Barnes strongly suggests testing any pour under 3mm or over 10mm, since the total cast mass and the temperature of your workspace can both affect the cure.
Jewellery, keyrings, pen blanks and small homewares
Epoxycast Clear Casting Resin names jewellery directly in what it is recommended for, alongside knife handles, pen blanks, small to medium homewares and embedding objects. Mixed 2:1 by volume. CLARITI PRO is the other option here, since it is formulated for smaller parts and for cooler workspaces where a standard casting epoxy would be slow to demould.
Medium castings, spheres, cubes and small river tables
Ultrapour Mass Cast Epoxy. The longer work time lets you reach good clarity without a vacuum degassing system, and mix bigger batches with less heat. Mixed 2:1 by volume. A 500ml mass gives 2 hours or more of pot life and demoulds in 24 to 48 hours, curing to Shore 80 to 82D. Recommended for mass casts, small river tables or river cutting boards, medium homewares, and medium spheres, cubes or orgones.
Deep pours and river tables
Megapour Deep Cast Epoxy Resin. Built for depth, at 50 to 100mm per pour, with low heat generation. Mixed 2:1 by weight. A 1650gm mass gives 2 hours or more of pot life and demoulds in 24 hours or more, curing to Shore 80 to 85D. One hard limit worth repeating, because it catches people out: if Megapour is poured in small volumes, or in pours of 10mm and below, it may take a long time to cure or fail to cure to its intended properties. Deep pour resin is not a general purpose resin used shallow.
Small, fast pieces
Clear UV Resin is a one component resin that needs no mixing and no measuring. Dispense it, then hold a 36 watt UV lamp 10 to 25cm away for 5 minutes or more. Good for jewellery, key chains, small decorative pieces and filling small knots in timber. Keep applications thin. Faster curing rates increase shrinkage, and an over thick application can subside in the middle of the layer.
Choosing your colour
Colour is where a piece gets its character, and where a lot of failed pours start. Every liquid pigment has a ceiling, and going past it can stop the resin curing.
Hero Resin Pigments are ultra concentrated liquid colourants made for epoxy. Start at 1 to 3% by weight of your total resin mix and adjust from there. Used within the recommended load rate, typically under 5%, they will not affect the cure or the strength of a properly mixed epoxy. All the colours in the range intermix, so you can blend your own.
PSTF Translucent Pigments should be no more than 5% of the total amount of resin, because a higher percentage may prevent the resin from curing properly. Below that ceiling they are the way to get an optically clear tint, and adding more moves the finish from transparent towards translucent without losing clarity.
Opaque Pigment goes in at roughly 1/2% by weight. Some materials are naturally dark or opaque and may need anywhere from 1% to 5% to reach the colour you want. Add it to the A side in an epoxy system. Be honest with yourself about how much you are adding, because liquid pigments can often affect a material’s physical properties if too much goes in.
Alumilite Resin Dye is very concentrated. Use the smallest amount that gets you the colour, up to 5%. For a small batch you may need less than a single drop, which you can do by touching a drop onto the tip of a mixing stick rather than dispensing it straight into the resin.
Depth changes how a colour reads. The same dye looks paler in a 2mm coating than in a deep casting, simply because there is less pigmented resin for light to travel through. If a coating looks washed out next to your test cast, that is why.
Powder pigments behave differently again. Pearl Ex, PolyColor, Elementz and the glitters sit in the resin rather than dissolving into it, which is what gives them their metallic and pearlescent look. A useful trick is to tint the resin with a PSTF dye first and then add the powder, so the powder reads against a base tone instead of against clear. A glow powder can settle at the lowest point of a slower curing resin, so it may end up brightest at the bottom of the piece.
Browse the full range in resin pigments, or go straight to powder pigments and opaque pigments.
Moulds and surfaces
What you pour into matters as much as what you pour.
For casting, you have two routes. The quick one is a ready to use silicone mould. Our range covers bangles, rings, platters, rectangle bars and orgone bases, and they are reusable straight out of the packet. The other route is making your own, which is how you cast something nobody else has.
Pinkysil Fast Set Silicone is the usual starting point for a first mould. It mixes 1:1 by volume with no scales and no degassing needed, gives about 6 minutes of work time, demoulds in 30 minutes, and cures to Shore A20. It picks up very fine detail, which is what you want for jewellery and small castings. It is certified suitable for skin contact, though it is not certified for food contact. If you are building a mould around an object you will want a mould box to contain it, and the wider silicone rubber range covers the slower, larger pour options.
For coating, you want a flat, rigid, level surface. MDF art boards, canvas, timber platters and boards all work. Whatever you use, it has to be genuinely level, because resin will find the low corner and stay there.
Sealing matters on anything porous. If you are embedding organic material such as flowers, dry it out and seal it first. Damp or porous inclusions release moisture and air into the resin, which can stop it curing around them. Bare timber and unsealed board edges do the same thing.
If you only want resin on the top face of a board, run painters’ tape firmly around the edge before you pour, and pull it once the resin has gelled.
Get ready to create
The walkthrough from here uses Barnes Epoxyglass on a flat art board, which is the classic first resin art project.
Prepare your workspace by covering your work surface with a plastic drop sheet. Elevate your artboard by placing it on an upturned ice-cream container. Make sure the board is level, and at least 20cm back from the edge of the table so resin runoff will not go on the floor.
Choose your colour scheme. We recommend using up to six different colours for your artwork. Use a range of Barnes pigments, dyes and powders to create a layered effect.
If you prefer to only resin the top of your artboard, place painters’ tape firmly around the edge of your piece.
Put on your personal protective equipment, and have your mixing and measuring items at hand, and you are ready to create!
Measuring and Mixing
Measure out equal parts of Barnes Epoxyglass Part A and B separately in the 300ml Measuring Cups. As an example, 300ml of resin would equate to 150ml of Part A, and 150ml of Part B in a 1:1 by volume ratio.
Pour both parts into a 600ml Measuring cup and mix thoroughly for 2-3 minutes. Transfer all resin to a second beaker, to ensure that the product cross links correctly. Mix thoroughly again for another two minutes. You will notice that as you mix the product, any striations through the resin will clear.
Don’t worry if the resin has bubbles or appears to be milky. This will not affect the outcome of your resin artwork
Once part A and B have been mixed you have about 40 minutes of working time depending on the ambient room temperature before the resin starts to set.
Pigmenting and Pouring
Distribute the mixed resin into your 210ml plastic cups. Allocate the amount of resin according to how much of the colour you want more of in your artwork. Add Barnes resin pigments to each of the small plastic cups, mixing until they are blended.
We recommend using Barnes Opaque white resin as a dominant colour if you would like to create resin cells in your artwork.
Pour the pigmented resin onto the artboard. We recommend you start with the dominant or background colour. You can use a tongue depressor to spread the resin and cover the artboard, and to draw the colours through the resin.
Use the heat gun to move the resin across the board, and to release any surface tension. This removes bubbles from your resin artwork. Always keep the heat gun moving and well above the surface of the resin to avoid overheating or ignition.
Curing
Your resin artwork won’t cure for 24-36 hours, longer if the temperature is below 18°C. Avoid working in high humidity as this may leave an unwanted finish on the surface and ruin your art. You may like to cover your artwork with a cardboard box to ensure no dust particles land on your artwork.
What goes wrong, and what to do about it
Most resin problems come back to one of four things. None of them mean you have ruined it.
Bubbles
Bubbles in the mixing cup are normal and are not the problem. On a coating, pass a heat gun across the surface once the resin is spread, keeping it moving and well above the surface, and they will release. On a casting you have fewer options once it is poured, so the work happens earlier. Mix without whipping air in, and let the resin stand for a moment before you pour. CLARITI PRO has strong air release on its own and can also be run through a vacuum degasser if you have one. A line of bubbles rising through a casting usually means air is escaping from an unsealed inclusion or a porous surface rather than from the resin itself.
A sticky or soft cure
This is almost always ratio, mixing, pigment load or depth. Measure by the ratio stated for that product rather than by eye, and check whether it is by volume or by weight. Mix in two vessels, transferring everything across partway through, so the product cross links properly. Keep liquid pigment under the stated ceiling for that pigment. Then check your depth against what the resin is designed for. A deep pour resin used shallow is the classic version of this, which is why Megapour warns that pours of 10mm and below may fail to cure to their intended properties. Cold rooms simply slow everything down, so give it longer before you decide it has failed.
Yellowing
Clear epoxy is sensitive to UV, which is why the resins here are formulated against it. Epoxyglass carries UV stabilisers to reduce yellowing, CLARITI PRO contains anti-yellowing and UV resistant additives, and Epoxycast, Ultrapour and Megapour all contain anti-yellowing additives. Keeping a finished piece out of long hours of direct sun will always help.
Uneven pours and dips
Level the board before you pour, not after. On a casting, a surface that subsides in the middle usually means the layer was too thick for the resin or cured too fast, which is the specific warning on Clear UV Resin.
If something has gone wrong and you cannot work out why, tell us what you used and how deep you poured it. That is usually enough to spot it.
What’s next?
Loved using Barnes Epoxyglass? Did you know you can use it as a coating on decorative homewares and to dome over polymer clay? If you are ready to try casting rather than coating, start with a ready to use mould and a casting epoxy matched to the depth you need.
Ask our friendly staff in-store, or email [email protected] for product support and technical information.